No products in the cart.
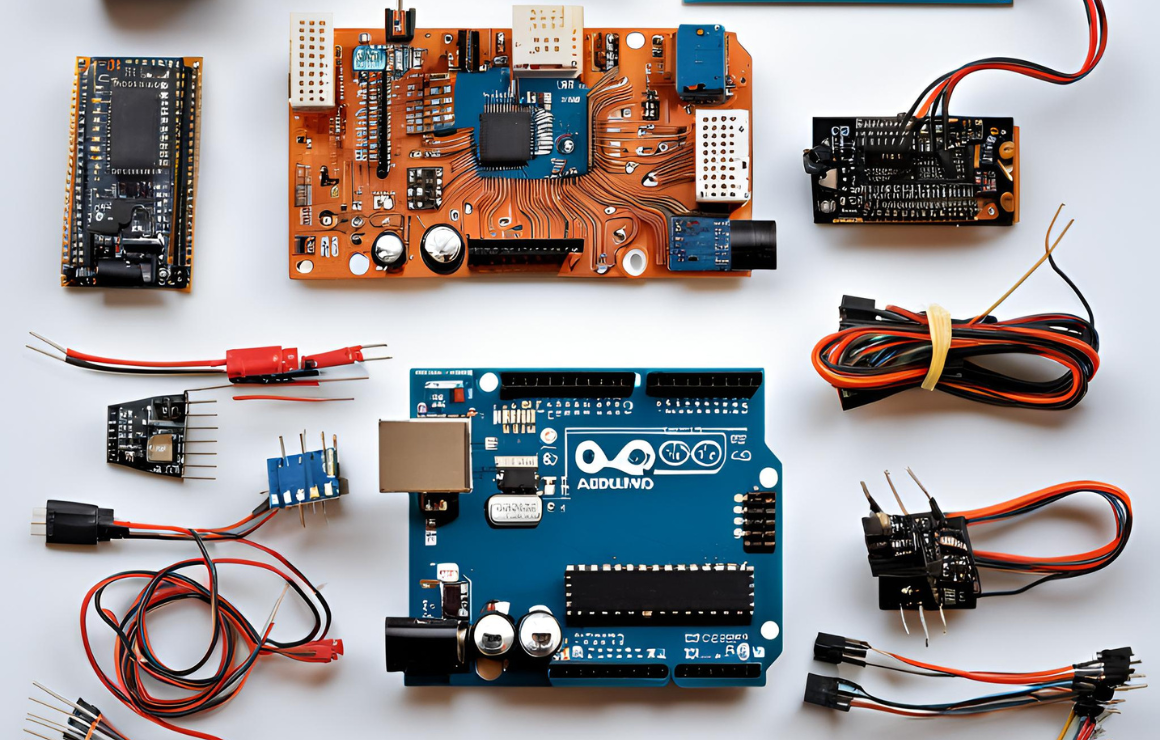
Exploring the Arduino UNO: A Beginner’s Guide to DIY Electronics
/Posted byadmin
Exploring the Arduino UNO: A Beginner’s Guide to DIY Electronics
Introduction
The Arduino UNO is an open-source microcontroller board that’s perfect for beginners in electronics and programming. Its versatility and user-friendly nature make it an ideal choice for various projects, from simple LED blinkers to more complex robotic systems.
What is the Arduino UNO?
The Arduino UNO is based on the ATmega328P microcontroller. It features 14 digital input/output pins, 6 analog inputs, a USB connection, a power jack, an ICSP header, and a reset button. The board can be powered via USB or an external power source.
Getting Started
1. *Setting Up the Arduino IDE*
– *Download the IDE*: Visit the [Arduino website](https://www.arduino.cc/en/software) to download the Arduino Integrated Development Environment (IDE).
– *Install the IDE*: Follow the installation instructions for your operating system.
– *Connect Your Board*: Use a USB cable to connect the Arduino UNO to your computer.
2. *Writing Your First Program*
– Open the Arduino IDE.
– Select the correct board and port from the Tools menu.
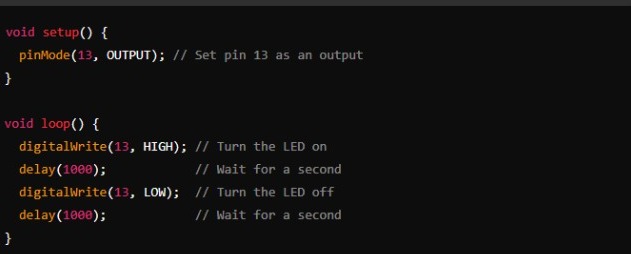
– Write a simple program to blink an LED:
3. *Basic Components*
– *LEDs*: Light Emitting Diodes, used for visual feedback.
– *Resistors*: Used to limit current to protect components.
– *Breadboard*: A board for prototyping circuits without soldering.
– *Jumper Wires*: Used to connect components on a breadboard.
Simple Projects
1. *Blinking an LED*
– *Components*: Arduino UNO, LED, 220Ω resistor, breadboard, jumper wires.
– *Connections*:
– Connect the longer leg (anode) of the LED to pin 13 through the resistor.
– Connect the shorter leg (cathode) to ground (GND).
2. *Reading a Button Press*
– *Components*: Arduino UNO, push button, 10kΩ resistor, LED, breadboard, jumper wires.
– *Connections*:
– Connect one leg of the button to pin 2 and the other to ground.
– Connect the LED as described previously.
– *Code*:

3. *Controlling a Servo Motor*
– *Components*: Arduino UNO, servo motor, jumper wires.
– *Connections*:
– Connect the servo’s control wire to pin 9, power wire to 5V, and ground wire to GND.
– *Code*:

## Resources for Further Learning
– *Online Tutorials*: Websites like Arduino’s official site and platforms like Instructables and YouTube offer countless tutorials.
– *Books*: Look for beginner-friendly books on Arduino and electronics, such as “Getting Started with Arduino” by Massimo Banzi.
– *Community*: Join forums like the Arduino Forum or Reddit’s r/arduino to connect with other enthusiasts.
Conclusion
The Arduino UNO is a fantastic starting point for anyone interested in DIY electronics. With its extensive community support and numerous resources, you can explore a wide array of projects and expand your skills in programming and circuit design. Happy tinkering!
Related posts
Smart Home Automation System Ever wanted to control your home’s lights or fans from your phone? With Arduino, you can!...more
1. What is an Arduino Board and Why Is It So Popular? Description: The Arduino board is an open-source microcontroller...more
1. Overview of the Project: This project demonstrates how to build a basic obstacle-avoiding robot. The robot detects objects using...more
Creating an ultrasonic-based radar project with Arduino involves using an ultrasonic sensor (like the HC-SR04) to detect objects and display...more
